Yesterday I shared a cute card I created using the sly kitty and today I have a card for all you pup lovers! You didn’t think I would leave you out did you?
Unity Stamp Co has some amazing new releases this month and “Boop the Snoot” is another fun kit to add to your collection!
Here’s a look at the kit and the fun sentiments that come with it
Boop the Snoot
And here’s a look at the cute card I created :
Boop the Snoot
That nose!! Naturally you’re drawn to “Boop” it! I opted to include a sentiment inside the card and left the front clean and simple.
I started with a black cardstock base and trimmed pattern paper 1/4 inch smaller and glued them together. I used a smaller piece of coordinating pattern paper and glued this off to the left hand side as shown.
I stamped the image with waterproof ink and used my watercolor pans to bring him to life.
Once dry I cut out the image with a rectangle die and glued it to a piece of red cardstock 1/4 inch larger (as shown)
Before adhering the image to my card I used a tag punch and a scrap piece of pattern paper to create a little tag, glued it to my matted image and then used foam adhesive to put it all together.
Two puffy heart dies were used to create the heart accents.
Of course, wet snoots are a dog’s trademark so I added some clear Nuvo gel to the nose to make it shiny. Can you tell in the closeup?:
I like making cards that are quick, simple and easy to replicate. This is a perfect example of how you don’t need a lot of supplies, skill or time to create a card that will make the recipient smile.
I hope you found a little INKspiration here today!
Today I’m sharing a sweet and simple card I created using the new release “Grin & Purr” from Unity Stamp Co. It’s such a fun stamp kit that would be purrrfect for so many occasions!
Here’s a look at the kit and sentiments that come with it:
Grin & Purr
I love the sneaky little look on this feline’s face. What is he up to? Hmmmmm…
Here’s the very sweet and simple card I created using this kit:
Grin and Purr
The fine detail in this stamp makes coloring the image super quick and easy.
I started with a black cardstock base and trimmed my patterned paper 1/4 inch smaller than the base and glued them together.
After stamping the image in watercolor ink, I used my watercolor pans to bring it to life. It was so quick and easy! I did use a few different layers of watercolor, ensuring each layer was dry before re-adding more color.
Once the image was colored I used a stitched rectangle die to cut out the panel and then glued it to a black mat cut to 1/4 inch larger than the panel.
I used foam adhesive to attach the panel to my cardbase and added a ribbon and a few Nuvo drops as accent pieces.
That’s it! So simple!
Here’s a closer look:
Grin & Purr
I hope you found a little INKspiration here today!
Until next time, be sure to spread a little kindness wherever you go!
It’s the first Saturday of the month which means another fun Friends of Unity Blog Hop!
This month we have a FUN sketch for you to try! I absolutely love sketch challenges as they help me tremendously to get “unstuck” when I can’t decide on a design. They can be used “as is” or you can add your own twist to them! I have done both for this challenge so that you can see how the sketches can be simply used as a creative starting point.
Before we start, just a reminder that Unity Stamp Co. does not sponsor our monthly hops BUT they do lovingly approve! Should any of our Team Members offer prizes please know they generously give away products from their own personal stash. We are so grateful that Unity Stamp Co allows us to showcase some of our favorite Unity stamps each month and we are super delighted to have YOU hop along with us! Please be sure to leave me a comment so that I know you were here! I read each and every one and it brings me so much joy to know that you stopped by for a bit. I hope you find something on my page today that INKspires you to give this month’s sketch a try! Tag me if you do!
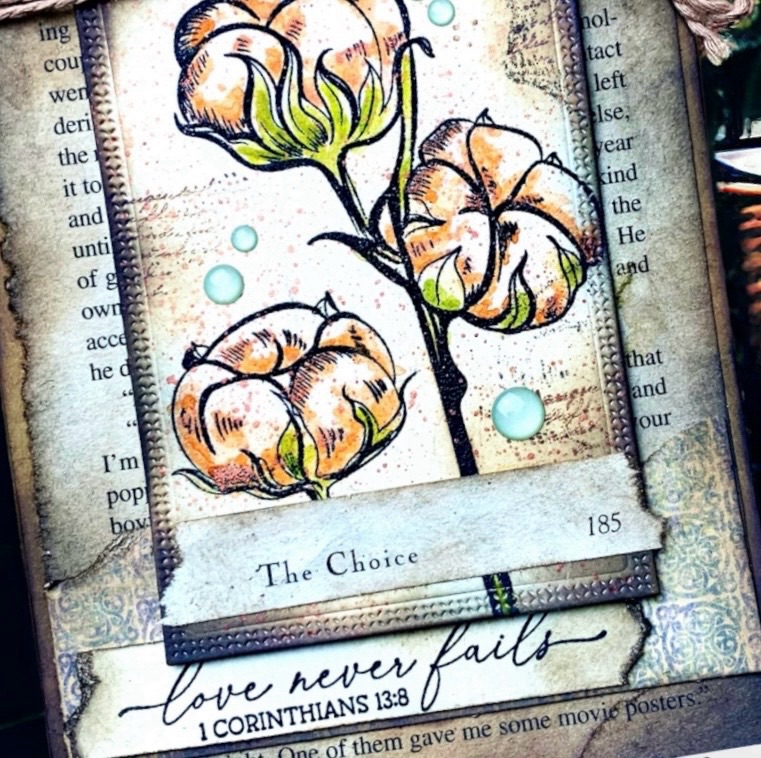
Using the sketch provided I created my first card with the gorgeous floral kit called Cotton Embrace. This is a beautiful open floral that is so very easy to watercolor. I absolutely love it!
Cotton Embrace
I started with a light brown cardstock base and used distress oxide ink to ink around the edges to give it an old/weathered look. I then ripped a page right out of a Nicholas Spark book and did the same. Once the edges were distressed I glued it to my base.
I stamped the cotton buds onto Hammermill cardstock using Versaclaire Nocturne ink and quickly added black embossing powder then heat set the image. I find I get better watercolor results this way-nothing bleeds!
I also used distress oxide inks around the edges after cutting the image out with a stitched rectangle die. I also used a texture stamp and some distress ink in walnut stain to add some visual texture to the background. It’s very faint so as not to take away from the focal point. I used watercolor pans to paint the image and once dry I ripped another piece of the book page and attached it as shown.
I had a piece of scrap pattern paper that I ripped, distressed with ink and glued down to my base. I used a sentiment from the “He Provides” kit and stamped on white cardstock. I distressed the sentiment as well and glued it to the base.
I wrapped some twine at the top of the card and using foam tape I then adhered the blossoms onto the card base to finish the project.
A few gems were added for a sweet accent.
I really love how this card turned out.
Here’s a little close up:
For some reason the gems look light blue in the picture but they’re actually more of a light gray.
For my next card, I turned my project horizontally and used the sketch as a guide. It’s really fun to see everyone’s interpretation of the sketches. Some people follow them exactly as created and some come up with their own versions! There are NO rules! (Which is great because I don’t follow rules very well)
I started with a dark brown cardstock base and used a piece of patterned paper for my background. The pattern paper looks like rust. It’s really cool and I thought it paired well with the design.
I stamped the trees in dark brown ink and using shades of yellow, orange, green and brown I inkblended the background. I also stamped a bit of texture in the background as well. Its very faint but it gives it a but if visual texture. I added some splatters of white paint to break up the dullness the browns were giving off. While the splatters were drying I stamped the cabin, fussy cut it out and watercolored the image,
I tore a piece of green cardstock to run along the bottom of my stamped image. After gluing it down I then glued the cabin to the finished stamped piece.
I used a piece of scrap pattern paper and glued this down to my base as shown. The sentiment was stamped onto white cardstock, distessed with ink and I lightly stamped sprigs of grass to visual texture.
The sentiment was glued to a black background then adhered to the card using foam tape.
Lets see if we can take a closer look:
I think this would be a great non-traditional Valentines Day card especially if the recipient was the “outdoorsy” type, don’t ya think?
For my final card I switched the sketch up just a little by putting the sentiment at the top of the card vs the bottom. Remember, no rules! Use sketches as a guide and see what unfolds!
For the next card I used the kit “I really love you” and I really love this image!
I really love you
I started off with a black cardstock base and cut a white piece of cardstock for the background.
I stamped the image using Versaclaire Nocturne ink and embossed over it with black embossing powder. Using a stitched die, the image was cut out and the edges inkblended. I used a cloud stencil and lightly inked the background in a pale pink. The hearts were brought to life using my watercolor pans.
A strip of pink glitter paper was placed at the bottom of my background as shown. I also used a scrap piece of the sane glitter paper and my tab punch to create a fun tab.
The sentiment was stamped and glued to a strip of patterned paper. The tab and banner were added as accent pieces and then the image was adhered to the base with foam tape.
Here’s a closer view:
Well friends, that’s all I have for today! I hope that you found something to INKspire you to try this month’s sketch! Thank you SO very much for stopping by and supporting our little hop!
Before you go, I would love to know what your favorite card was this month! And please be sure to check out what all of our FOU friends have waiting to share with you as well!
If you’re ready to move along, our talented friend Dawn has some great ideas in store for you!
If you want to start from the beginning, you’ll be excited to check out Crystals page!
Hellllooo my crafty friends! I sure hope everyone had a wonderful winter holiday season and is excited for the New Year to begin! I know I am INKredibly excited for this year’s line up as a Friends of Unity Team Member! We have SO many fun themes scheduled for this upcoming year for you!
We are starting off the year with “ Laughter, Giggles and Smiles”. What a perfect theme to begin with, don’t you agree? Before I share my projects with you I’d like to personally thank Crystal Minkler for her dedication and hard work in keeping the FOU Hop running so smoothly but also for keeping all of our Team organized! It’s no easy task and her hard work is so greatly appreciated! Thank you Crystal for spearheading another amazing year of creativity for us all!
I also want to thank the beautiful creatives who are part of this amazing team that inspire me to continue to create and who are genuinely supportive humans. I’m so honored to be amongst them each month as we share our love of papercrafting. Please be sure to show each one of my team members lots of love as you hop a long with us ! We so greatly appreciate your support and kind comments.
And lastly, but certainly not least, a huge thank you to Unity Stamp Co who supports our love of their company by allowing us to showcase their amazing products each month. I appreciate not just the company and products but the tight-knit community they have built which has brought so many new friends into my life. Thank You!
Thank YOU for visiting my blog today! Without YOU , I personally would be uninspired to create or share my projects. YOU are the most appreciated of them all! Thank YOU for your unwavering support and encouragement as we create another INKredible year together!
If you’ve gotten this far you’re about ready for some INKspiration now! So, with the Laughter. Giggles, and Smiles Theme in mind, lets begin!
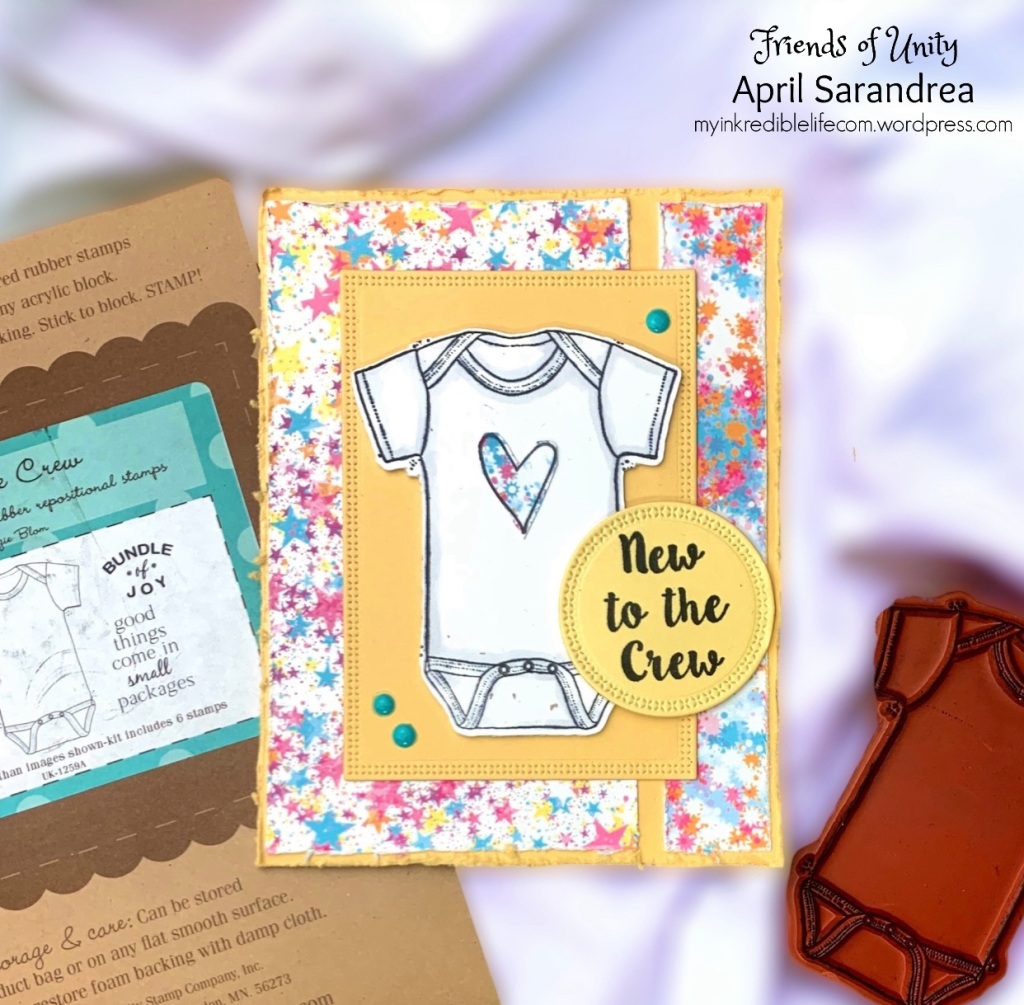
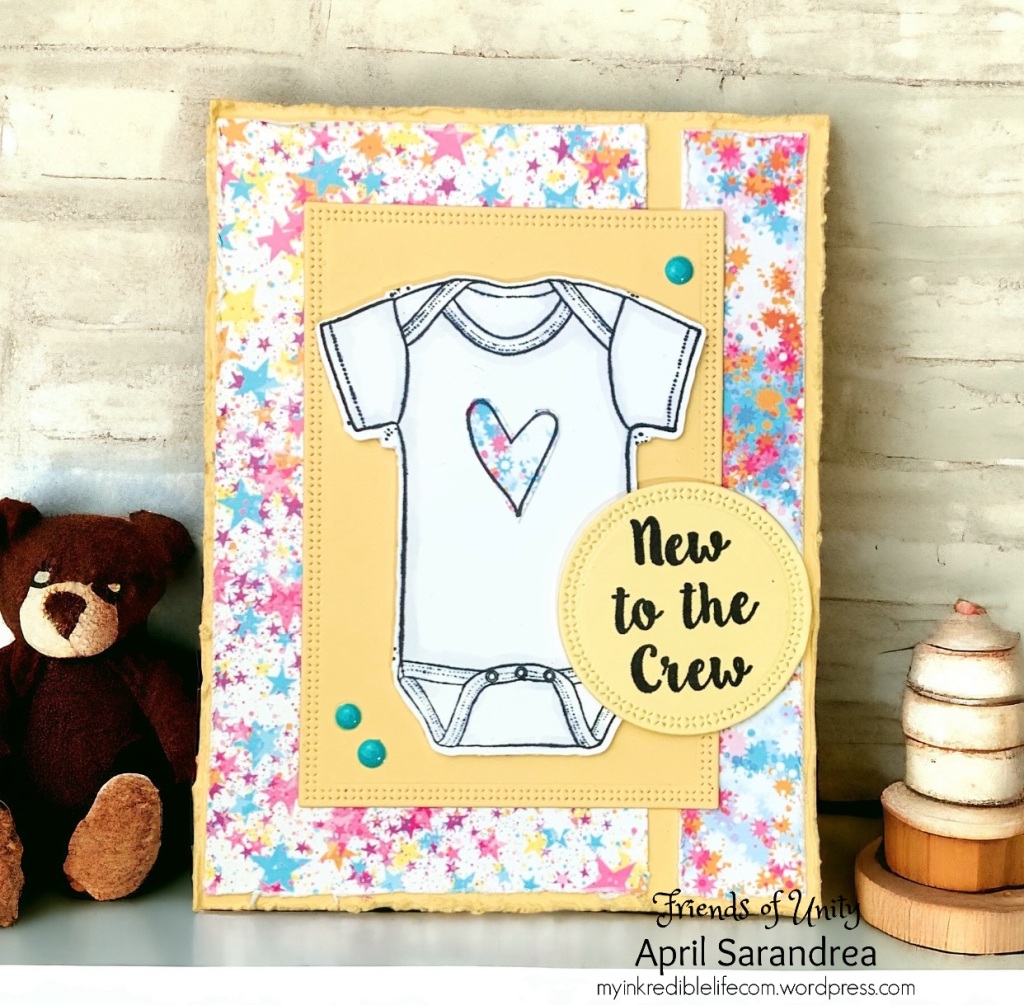
I struggled a bit at first coming up with some ideas for this month’s theme-but then I had an Aha! moment! What brings more giggles, laughter and smiles than the thought of welcoming a new baby! So I started my first card using the kit “New to the Crew”. The onsie in this kit is absolutely a must have and oh so cute!
New to the crew
I wanted my card to be neutral in palette colors so I chose this beautiful double sided patterned paper and a yellow cardbase to achieve the look. I have also been obsessed with texture lately so I roughed up the cardbase and paper edges a bit. I used a rectangle stitched die to cut out a matte for the focal point and glued the piece to my card base (after adhering the paper of course)
The onesie was stamped onto white cardstock and cut out with my scan & cut machine. I used a very light gray alcohol marker to give it a bit of shading. Using a scrap piece of coordinating pattern paper I stamped the heart and glued it to my onesie. The onesie was attached to the card with foam tape for dimension.
I stamped the sentiment onto yellow cardstock and used a stitched circle die to cut it out. This also was attached to the card with foam tape.
I used a few Nuvo drops to add a bit of accent pieces to the card. Here’s a closer look:
And even closer:
This card , and new to the crew family addition, is sure to bring some smiles, giggles and laughter !
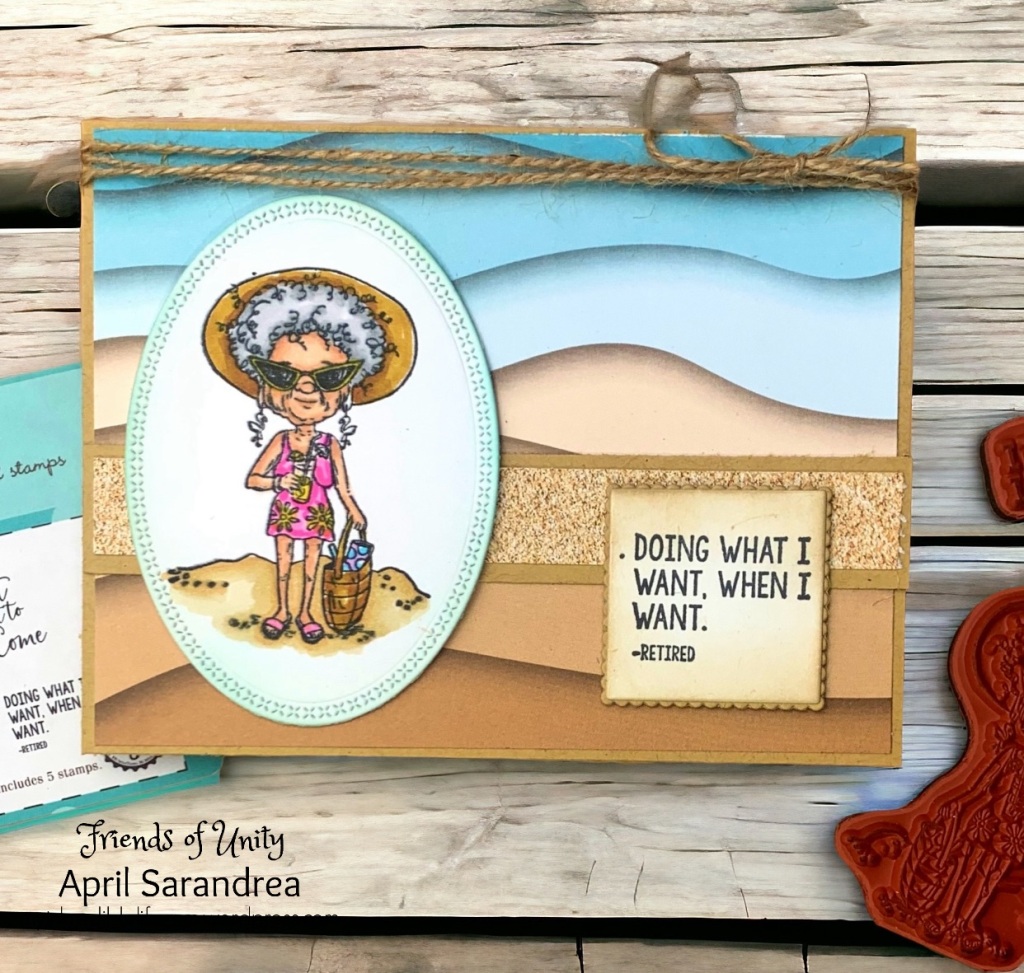
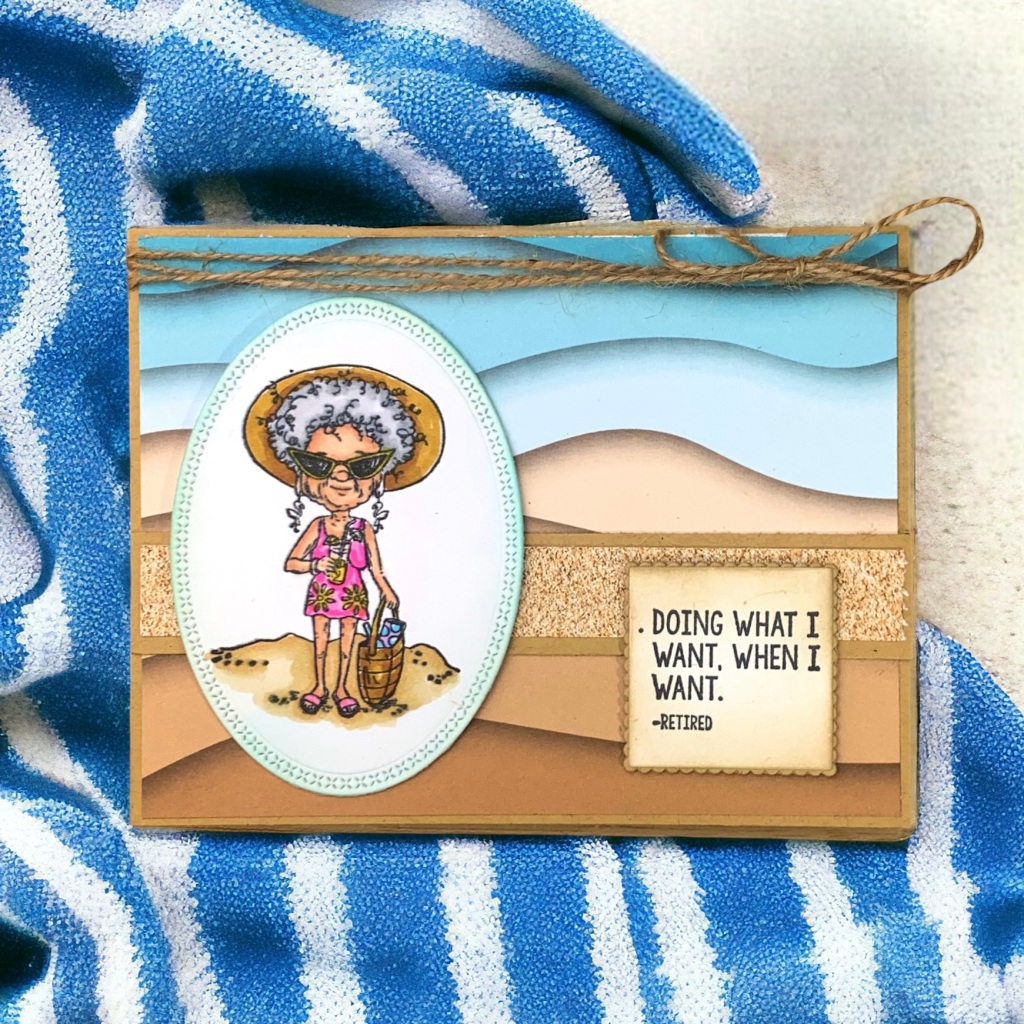
Next up, is a card I created that would certainly bring me a smile to receive- one for retirement! I have quite a few more years to go before these words will bring smiles, giggles and laughter in my life but we can certainly appreciate sending this card to someone who has earned it! And this lil old lady has the perfect mindset, doesn’t she? She comes from the kit called “Retired” and also has a companion in the kit with her which makes it perfect to use for anyone ready to say adios to the rat race of the working world!
Retired
For this card I used a kraft colored cardstock base and pretty “beachy” pattern paper! This year I plan on using SO much of my pattern paper rather than hoarding it. I have plenty enough to last me until I am ready to retire that’s for sure!
I cut a strip of coordinating cardstock and sand themed pattern paper to adhere to the base (as shown) to break up the pattern just a bit. This paper pattern is gorgeous isn’t it?
I stamped our new retiree onto cardstock and cut out the image with a stitched oval die – one of my most underused dies in my collection. I do need to incorporate ovals a bit more into my projects. I brought her soul back to life from the job that sucked it out of her for decades using alcohol markers, brushed the edges with ink from Gina K and attached her to the card using foam tape.
The sentiment was also stamped onto white cardstock, brushed with ink from Gina G and cut out using coordinating square dies. This, too, was attached using foam tape for dimension.
To tie it all together (see what I did there? A lil punny humor) I wrapped some twine around for additional accent.
Here’s a closer look:
And a wee bit closer:
I surely can’t wait for the day I can do what I want, when I want! Our retirement destination is also to the beach but in Playa Del Carmen, Mexico. In the meantime, our new retiree can smile, giggle and laugh at me as I remain chained to my desk, marking off my calendar for the next 10yrs. Lucky gal she is!
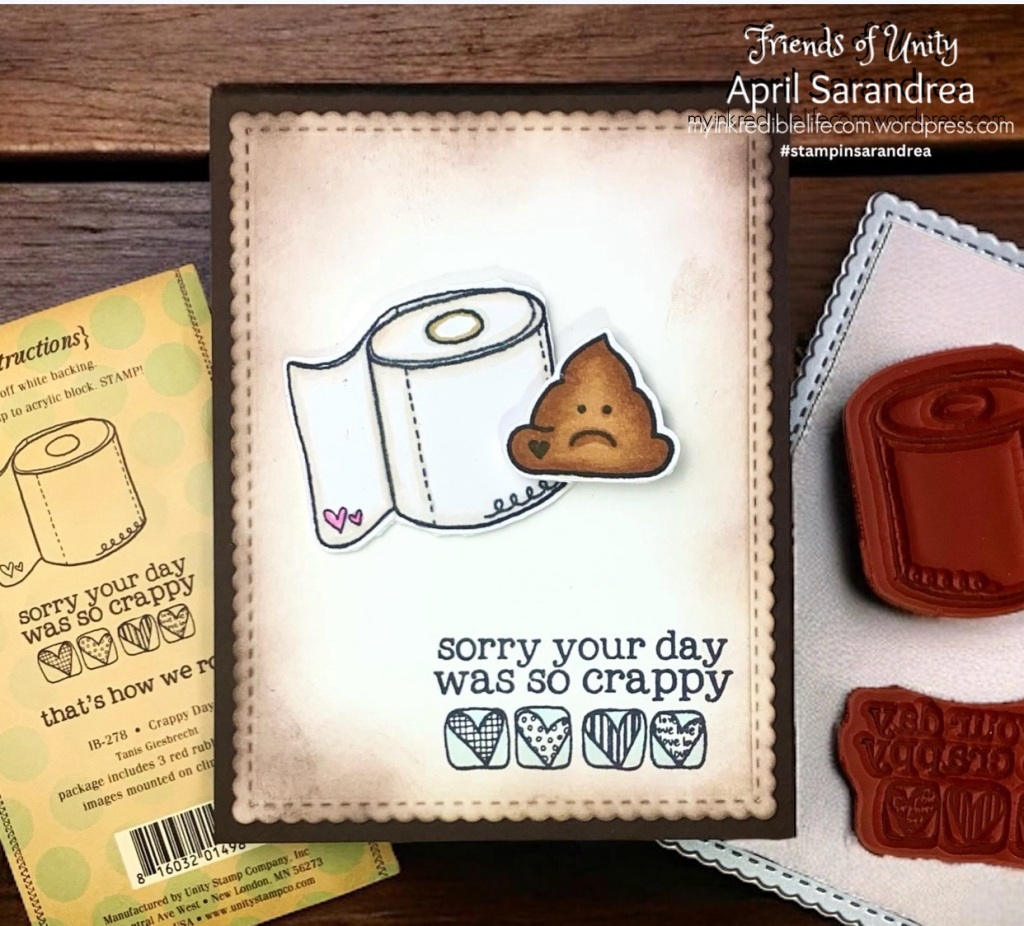
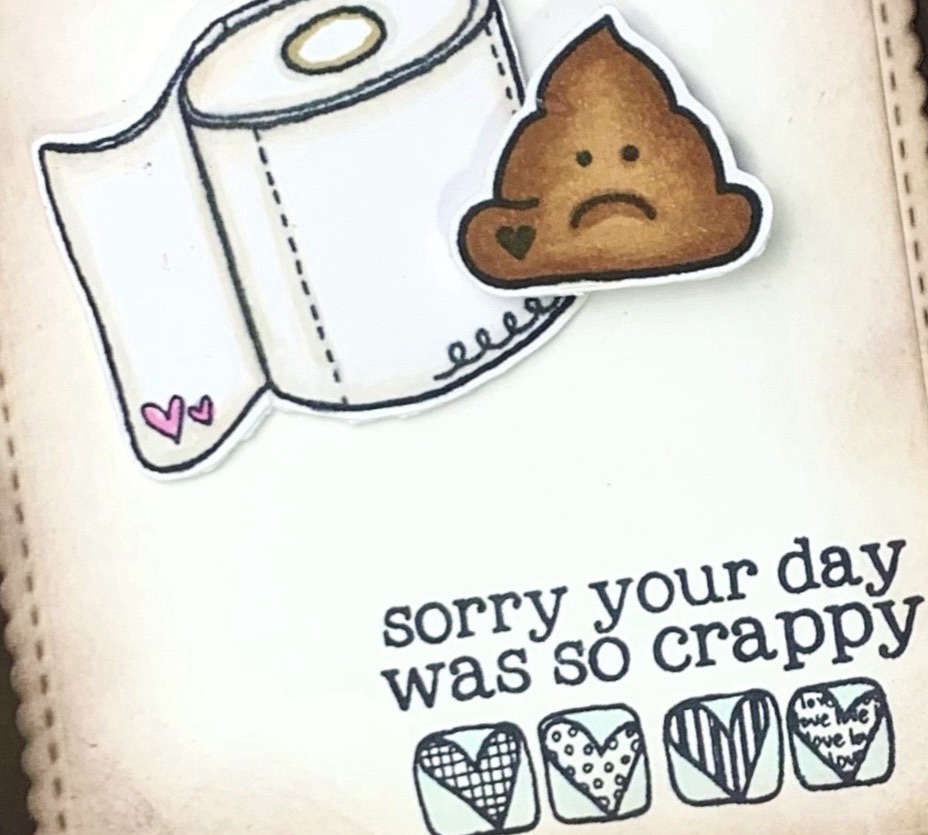
For my final project I used two kits that coordinate perfectly! I used “Crappy Day” and “Just Stinkin’ Cute”. I thought this would be perfect to give to someone who is having “one of THOSE days” and I’m sure we can all relate! (Except for our newly retired gal. She’s living the dream now)
This card was so simple to put together! I started off with a chocolate brown cardstock base (fitting, eh?) and cut out a white base using a scalloped rectangle die. I inkblended the edges of the white base using Gina K ink and glued this to my brown base. I stamped the sentiment in the lower corner and only colored in the background of the hearts.
After stamping my toilet paper and poo, I colored them with alcohol markers and attached them using foam tape for some added dimension. I told my son to give this to his manager at work as I’m sure it will bring a smile and laughter to her day (or early retirement for him if she doesn’t have a sense of humor) But, hey!…it’s worth a shot at cheering up someone who’s having a crappy day! That’s my thought anyway.
Here’s a closer look:
And a little closer- don’t worry, there’s no stink here!
Ha! I love it! I may make a few and keep them on hand at work myself! If you can’t laugh at crappy days, what can you do?
This concludes my share of smiles, laughter and giggles today! I hope you found a bit of INKspiration here. I’d love to know your favorite!
Before you go, if you aren’t already, be sure to follow me on Facebook at My INKredible Life and/or on Instagram ! Tag me with #stampinsarandrea if you were inspired to create a card using any of my ideas! I’d love to see!
Also, if inclined, I recently started a new Facebook page called Twigzandberries which focuses on my passion of holistic health, mindfulness and personal development. I’d love to inspire you some more there as well!
To start at the beginning of our hop, please head on over here to Crystal’s page :
To see what our next talented team member has in store for you, continue along here to see what Jane has to share!
Thank you for stopping by today! Have an INKredible month full of smiles, laughter and giggles!
I can’t believe another month has gone by already! I’m excited to be hopping along with all my Friends Of Unity this month after a short hiatus. This month our theme is slimline cards and Unity Stamp Co has quite a few slimline stamps in their collection!
With the holidays around the corner I took advantage of one of my favorite slimline kits called “Let’s Get Merry”. to design a quick and easy Christmas Card. I only created two cards this time around and used the same kit as this month kinda snuck up on me. (Sigh)
If you are pressed for time (like myself) this time of the year and want a holiday card design that can be created with fairly little effort – then grab this kit!
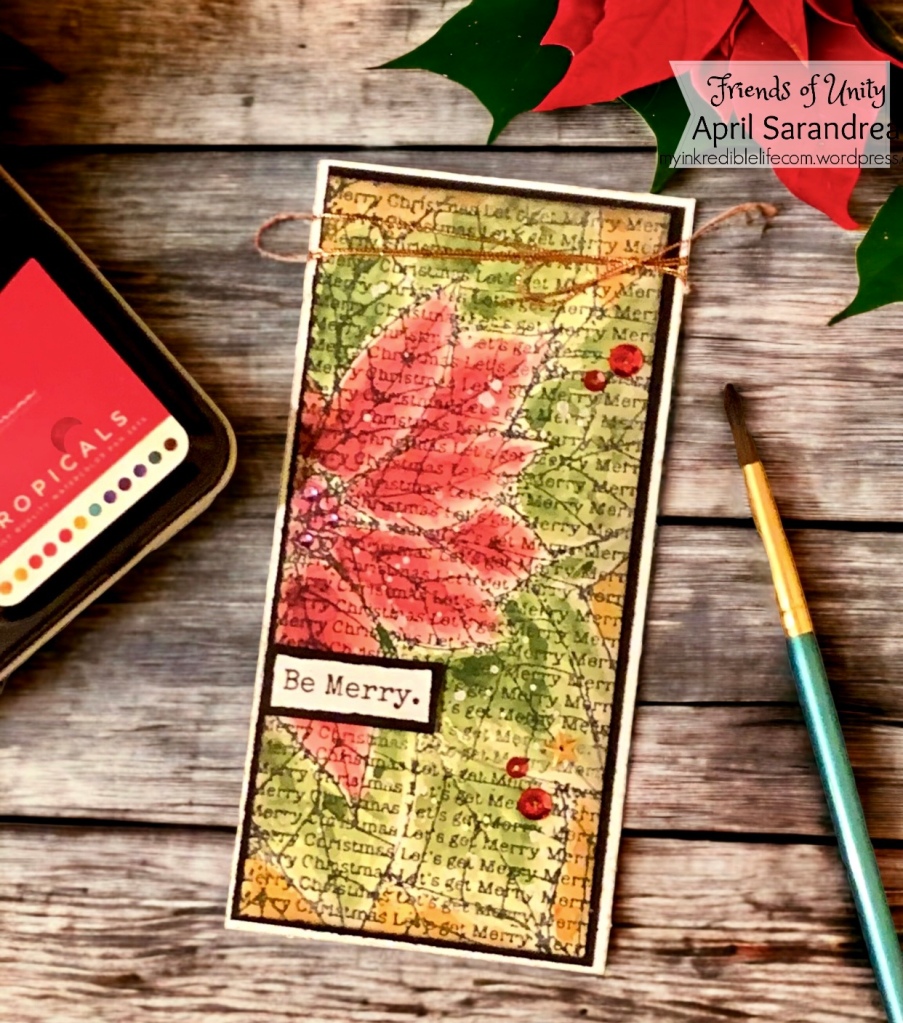
For the first card I used traditional holiday colors. I stamped the image using Versaclaire Nocturne ink onto Arteza watercolor paper.
Using my Prima watercolor pans I very loosely water colored the image as shown. I wasn’t careful or strategic about it at all. I simply just dropped color onto the paper. It took a few layers in different shades to get the desired look.
Once dry I inked the edges with Black Soot Distress Ink and added some white splatters. I then glued all the pieces together (as shown) and added some bronze twine and sequins to accent.
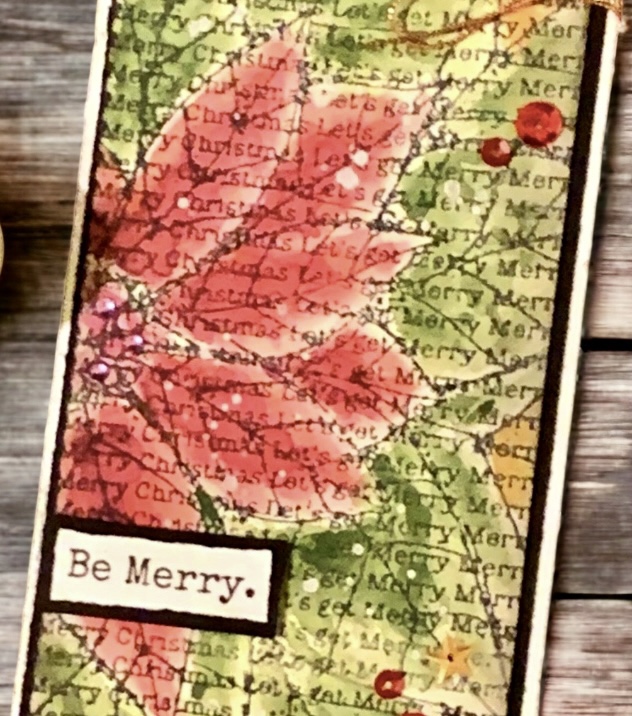
Seriously, I don’t think this could be any easier to make. Here’s a closer look:
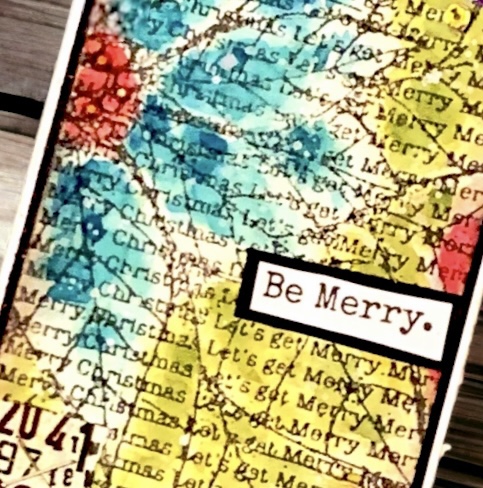
For the next card all I did was simply change the colors. Random fact about me: I do not like traditional Christmas colors of red and green. I like more non traditional palettes for winter like blues/pinks/purples.
Again I started off with inking the image in Versaclaire Nocturne ink and just loosely dropping color from my prima pans. Once dry J splattered some white paint for texture.
I dug out some washi tape and added sequins for accent. That’s it! With a design and technique as simple as this, you can create many cards in one sitting. So, if you find yourself waiting last minute (again!) with making your holiday cards this year- give this a try!
Here’s a closer look:
I’d love to know what colors you would choose. Is the traditional red/green your holiday vibe or do you gravitate towards non traditional colors?
Thank you SO much for visiting me today! I’d love to know what you think so please be sure to leave a comment (your comment may appear later as I have comment moderation enabled)
Please know that Unity Stamp Co does not sponsor the Friends Of Unity Hop (but they lovingly approve! ) With that in mind, we truly appreciate all of your love and support each month! Please be sure to visit each of our FOU team’s blog for tons of INKspiration.
If you aren’t already I would love for you to follow me on Facebook and/or Instagram where I am far more active !
Next up on the hop is our sweet & talented friend Colleen! I just know she has something inkredible to share this month with you!
If you would like to start from the beginning: check out what Crystal has in store for you!
I cannot believe how fast this week flew by! Today is my last day as a guest Growing in Unity, gal for Unity Stamp Co and I am so grateful for the opportunity to share some time, and projects with you all! Thank you all for taking time out to see what I created and to share your valuable comments. I truly had so much fun!
For the last project of the week I used the absolutely gorgeous kit called ” Hive and Herb“. I paired the kit with the Small Details background stamp as well as the beautiful patterned paper pack: “Pollinators Nostalgia“
This is such a gorgeous stamp kit and would work very well in mixed media projects! Here’s the deets on how I created this card:
I started off with an artichoke colored cardstock base and trimmed a piece of the patterned paper from the package to 1/3 smaller in size. I stamped the image using Gina K ink and cut it out using a scalloped tag die. Using a blending brush and the same brown ink, I inked up the edges of the tag.
Before adhering the patterned paper onto my cardstock base, I inked the edges of the paper, as well, using a blending brush and ink from Gina K’s inkpad collection. Then I glued it onto the cardstock base. I cut a piece or artichoke cardstock strip 1 3/4 inch wide and stamped the strip using Gina K’s ink and the Small Details background stamp. it’s hard to see in the picture but this really gives it a nice contrast. I frayed the edge of the Cardstock strip to look a bit weathered and tied some twin around it for accent. I then glued this down to my cardstock base.
I used the same twin to make a bow for my tag and after securing the bow to the tag, I used adhesive foam tape to attach the tag to the card. This gives it some dimension. I stamped the sentiment onto scrap cardstock and used a rectangle die to cut the shape. This was glued right onto the tag as shown.
Some beautiful flat back gems were added as accent pieces which I felt gave it the perfect touch. What do you think?
Well, it’s time to say goodbye to you all as this week’s Growing in Unity Gal, but you can still find me on my Facebook Page and on Instagram where I share far more inspiration! Be sure to follow me there! Before you go, I’d love to know you were here so please leave a comment and don’t forget to show love over in the Growing In Unity Group so that you have a chance to win a $20 voucher to the Unity Stamp Store! I sure hope it’s YOU that wins!
Thank you for your support and love this week! I hope you continue to create beautiful days for yourself and for others. Every little bit counts!
Thank you for coming back today as I share another card I created for this week’s Growing in Unity project! I just LOVE happy mail, don’t you? Whether I’m sending or receiving cards I know that it’s all done in love. And that’s a beautiful thing! The world needs more happy mail! The kit I chose for today is called “Done in Love” and it’s a gorgeous image with a beautiful sentiment that’s perfect for sending smiles someone’s way!
Isn’t this just so pretty? Here’s the deets on how I made it! :
I started off with a black cardstock base and cut some very pretty neutral gray and white patterned paper as shown. The floral patterned paper is cut 1/3 inch smaller than my cardstock base and glued down with Tombow glue. The wood grain strip is 1 3/4 inches and matted onto black cardstock 1/3 inch larger than the patterned paper. I then glued this down to my base as shown.
I stamped the floral envelope using Gina K Amalgam ink onto Accent white cardstock and heat set it to ensure that my watercolors didn’t run. Yep, cardstock not watercolor paper! I used the 140# paper and was careful not to saturate the paper with water as I colored the image. I also loosely watercolored as well which makes it really easy (and pretty!) to do. Once dry, I used my snips to fussy cut the image out added some white paint splatters using acrylic paint. After the splits were dry I used foam tape to mount it onto a black circle piece of cardstock that I cut out using a circle die.
The sentiment was also stamped onto white Accent cardstock and cut out using a rectangle die. Both the colored image and sentiment were glued onto the cardstock base as shown. I thought the florals needed some bling so I carefully glued rhinestones to the middle. A few gems were added to the sentiment strip as well to give it a little extra bling. I tied a bow using silver and white twine to add to the envelope which I thought gave it the perfect touch!
Here’s a closer look:
The florals really sparkle when it hits the light! I hope this card brightens up someone’s mailbox!
Thank you so much for stopping by today! I can’t believe my week as the Growing in Unity, gal is almost over! Be sure to come back tomorrow for one last project! And remember to comment so I know you were here, follow me on Facebook/Instagram and show some love in the Growing in Unity group for your chance of winning a $20 voucher to the Unity Store. I hope it’s YOU that wins!
In the meantime, be sure to create a beautiful day for yourself and someone around you!
I am SO excited to be this week’s {Growing in Unity} Gal! I hope to “ink”spire you to grab your favorite Unity Stamps and create something beautiful for someone this week!
Before I begin the week I want to thank the awesome peeps at Unity Stamp Co for giving me the opportunity to share my love of Unity with you all AND thank YOU, my crafty friends, for sharing your love of stamping with me! I hope you got a chance to read my bio over in the {Friends of Unity) Facebook page as you’ll learn a little about me and my interests outside of cardmaking and I hope to learn a little about you as you share your thoughts in the comments! Don’t forget to visit the FOU Facebook page ALL this week to show some love as there’s lovely prize to be offered at the end of my week!
Today I’m starting my week off with an “Aloha!” or “hello” using a kit called Olivia Girl. She has such a summer, vacation vibe going on and that’s exactly where I need my mind to be.
(I created this card prior to the terrible fires that devastated this gorgeous island and my heart is just breaking for the beautiful people of Hawaii. Let’s please keep them in our thoughts and prayers as they navigate a difficult time. )
Here’s the deets on how I created this card:
I started off with a black cardstock base and used a template from one of Unity’s creative Design Team members : Crystal Minkler. She has an awesome group called BYSHC where you can get inspired ALL year for holiday creations AND she has monthly sketch challenges. This is one of the sketches I borrowed from her group. I love how she puts all the measurements as well so it’s SUPER easy to follow. Be sure to check out her group for more ideas!
I cut all the coordinating pieces of patterned paper according to the dimensions in the template and matted them with black cardstock so they would pop.
Olivia was stamped using Gina K Amalgam ink (my “go to” for coloring with alcohol markers) and I fussy cut her with my paper snips. I used a variety of alcohol markers to bring her to life. You can mix and match your markers! I used a few Spectrum Noir, a few Oahu and a few Copics. Truth be told, my favorite are Oahu. They blend like a dream. Although they don’t have the expansive color ranges that Copic does, for someone who is a hobby artist they are perfect!
For the flower, I used a few of my Stampin’ Up! markers I had in my stash. I colored directly from marker to rubber stamp, gave a little huff and impressed the image onto white cardstock. I used a stitched circle die to cut out the image as shown. The sentiment was stamped directly onto a piece of white cardstock scrap piece and cut out using a rectangle die.
Both the sentiment and flower were glued directly onto the base. Olivia was propped up with some foam adhesive to give a bit of dimension. A few little white highlights were added with a Gel pen.
Here’s a close up:
That’s really all there was to creating this fun and summery vibe card! She’s ready to be popped into the mail to brighten someone’s day.
Thanks for stopping by today! Before you go be sure to leave a comment, follow me on Facebook and/or Instagram for more inspiration AND pop on over to the Growing in Unity FB Group and show some love! By visiting all week you increase your chances of winning a prize voucher to the Unity shop! I’d love for you to be the winner! And I love that you spent some time with me today!
See you tomorrow and be sure to create for yourself a beautiful day!
Welcome back to another fun Friends of Unity {FOU} Blog hop this month! This month is a very special hop as we are celebrating a recent birthday of one of my FAVORITE artists in the Unity Stamp line: Angie Blom! I discovered Unity Stamps by seeing cards made over in Stamp Junkies using Angie’s infamous line of faceless girls. I became intrigued and then fell in LOVE with them all! Once I discovered I could purchase them at Unity Stamp Co, I was hooked! So this month, our talented artist friends are sharing creations showcasing Angie’s line of stamps! So, happiest of birthdays to our beloved Angie Blom and I hope you’ll find something here to inkspire you to create along side us this month!
Before we begin, just a few housekeeping items to go over as reminders:
Our monthly blog hop is not sponsored by Unity Stamp Company (although they approve!). Our FOU blog hop team may generously offer prize packages each month. Please note, these goodies come from our personal stash and are not provided by the company. We all appreciate the love and support you show us each month and we may, at times, give out small tokens of appreciation.
I would love to know that you were here! I keep my comment moderation ON, so once approved, you will see your comment on the blog. Sometimes that may take me a day or two! I would love positive feed back on what inspired you or if you have any questions on any of the techniques or products I used.
Please show love and support to each team member of our blog hop! My friends put their heart into making projects in the hopes of inspiring you to create something beautiful!
If you aren’t already, I would love for you to give me a like/follow on Facebook (My Inkredible Life) or Instagram (@stampinsarandrea)as I am far more active on those platforms.
Are we ready to begin? Let’s go!
My first project I’m sharing I created using one of my favorite Angie Girl kits called “Bryna Girl”
I started off with a pink cardstock base and then using the rectangle nesting dies I cut out a scalloped rectangle from another pink piece of cardstock and a stitched rectangle mat from some pretty patterned paper. Using a dashes and frills heart die, I cut out a heart die cut also from pretty patterned paper. I stamped the sentiment in black Versaclaire ink and used a label stitched die to cut this piece out.
Bryna girl was stamped with Gina K Amalgam ink and brought to like with alcohol markers. I then fussy cut the image. After adhering the heart patterned paper to the scallop rectangle and then adhering that to my cardstock base I glued down the heart and the sentiment. Bryna was adhered using foam adhesive for dimension. A little Washi tape as added for some added contrast.
This was a very easy and fun card to put together. The kit is perfect for all occasions and is sure to be a favorite in your stash! Be sure to add her to your collection if you havent already done so!
Where are my dog lovers at!? Shari girl was one of the first “Angie’s Girls” to be added to my collection. The majority of my friends are dog lovers so naturally I needed to have her in my collection and she’s definitely well loved!
For this card I started off with a red cardstock base and then cut some adorable dog themed patterned paper 1/4 inch smaller and glued this to the base of the card. Isn’t it perfect for the theme? I stamped Shari with Versaclaire ink and heat set it so that it would not run once I began to bring her to using my watercolor pans. When the card was dry I cut it to size and adhered a red mat backing to it. Using a cloud stencil and distress ink, I created some clouds in the background. I popped a small gem on for her necklace for a little bling. The sentiment was stamped on white cardstock, trimmed to size and matted onto black cardstock as shown. For dimension, I adhered the sentiment to the card with foam adhesive.
This kit is super cute and is perfect for sending a little note to your dog loving friends. It’s sure to bring a smile to their face!
For my last project I used the Itty Bitty kit called “Not Be Perfect” which is a perfect summer vibe stamp!
For this card I started off with a black cardstock base and cut some pretty polka dotted patterned paper 1/4 inch smaller for my mat. I also cut out some coordinating striped paper and plaid paper as well. The image was stamped in Versaclair ink and heat set so it wouldn’t run as I loosely watercolored everything. Once dried I used circle dies to cut out the image and the coordinating mat that I adhered it to. Once everything was assembled as shown, I stamped the sentiment and cut it out to size along with the black mat and adhered it to the card with foam adhesive.
And there you have it friends! Three easy cards using several of my favorite stamps in the Angie Blom line over at Unity Stamp Co. I would LOVE to see what you create in honor of Angies Birthday Blog Bash! Be sure to tag me when you share!
Thank you SO much for checking out my little blog today! I would love to know that you were here so be sure to leave a comment and tell me what your favorite Angie Girl is!
Before you go, if you are not already doing so I’d love for you to give me a “like” over on my Facebook Page : My Inkredible Life and/or Instagram @stampinsarandrea
If you landed on my page first please be sure to go back to the beginning with Crystal
Next up is our very talented friend Gaylynn. I know she has something ahhhhmazing in store for you!
If you are ready to move forward, our lovely friend, has something to inspire you !
Until next time, I hope you find time to create something beautiful to brighten a friend’s day!


You must be logged in to post a comment.