It’s a………….. sandman??!!!!

Hi Friends!

I hope you are all having fun hopping along with us at the byshcardmakers hop! I will be perfectly honest, I am a beach gal. I love 100 degree weather and lots of sun! So, ahem…. winter is NOT my favorite. Nope. NOT AT ALL! If I had my way, I would spend every winter holiday on the sandy beaches of Mexico. Yep! And THIS would be my perfect “sandman”:

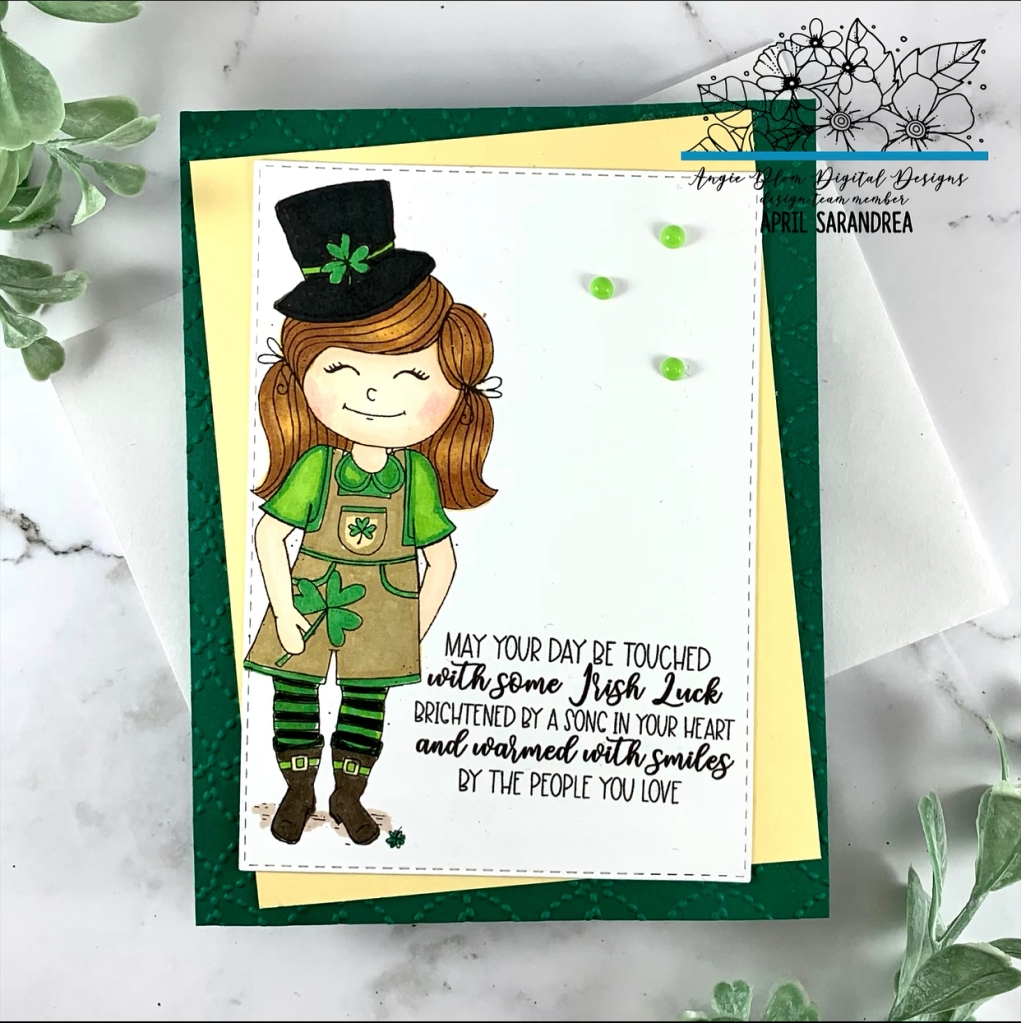
I absolutely love this adorable “sandman” from Angie Blom Digital Designs and this is my ideal “holiday” card!

I started off with a tan card base cut at 4 1/4 x 5 1/2 and then trimmed my patterned paper 1/8 of an inch smaller.

After printing the digital sandman image onto Hammermill cardstock I colored him using alcohol markers. After I was finished bringing him to life I trimmed him to the size using a rectangle stitched die. To create the tan mat, I simply measured and trimmed a piece slightly larger as shown.

The image was adhered using foam mounting tape. I then stamped the sentiment which is from a retired Stampin’ Up! stamp kit onto a piece of scrap tan cardstock and used a banner punch to create the banner effect. I also adhered to the card using foam adhesive. The clouds are from another kit by Angie Blom Digital designs and I cut them out after printing them for an added effect.

Have you been hopping along and adding your own creativity over at the BYSHcardmakers blog? I sure hope so as we have some fabulous sponsors for prizes waiting for you!

Thanks for stopping by and have an inkcredible day!

Let’s Be Merry!

HI Friends!

Today I’m sharing another card for the byshcardmakers blog hop! I used a beautiful digital image from Angie Blom Digital Designs today. This Santa image has so many possible ways to be brought to life, whether water colored, paper pieced or Copic colored as I have done here :

To create this card I started off with a black cardstock base cut at 5 1/2 x 4 1/4 and then trimmed another teal piece for my mat 1/8 of an inch smaller. The digital image was printed on Hammermill cardstock and I trimmed it down 1/8 smaller than the teal mat (as shown)

Using alcohol markers I colored the snowman and then cut out a medium sized snowflake using a die. I adhered the snowflake with glue and placed a pretty rhinestone in the middle. I also scattered a few more rhinestones around the card for some extra bling.

This design is a very easy and quick layout to mass produce which is perfect as the holiday rush tends to sneak up on us and we get a bit pressed for time!

Don’t forget to follow along and participate in the hop with us! We have some fabulous prizes from our sponsors just for you!

Thank you for stopping by and have an inkredible day!

Friends for Life

Hi Friends!

I had a special request to make invitations for a “gals only” get together for a group of long time friends. Here’s what I came up with!

I started out with a standard cardstock base in black and cut my patterned paper 1.8 inch smaller than my base

After gluing the paper to my base, I printed out the digital image on Hammermill cardstock and colored using alcohol markers

I trimmed both my image and the mat using my Fiskars trimmer, glued them together and adhered to the card with foam adhesive

The sentiment was trimmed using a rectangle die and also popped up using foam adhesive.

The inside (not shown) was printed out with all the details and then glued in place

And there you have it!

Thank you for stopping by and have an inkredible day!

Sending you a little luck

Hi Friends!

I’m not Irish but I do love those sweet Irish potatoes! Ham and cabbage isn’t all that bad either, wouldnt you agree?

Today I’m sharing a little Irish with you using a digital image called “Lucky Charm Girl” from Angie Blom’s Digital Designs. Isn’t she just the cutest?

I started off with a green cardstock base and ran the cardstock through my Big Shot using an embossing folder to give it some texture.

I then printed the image on Accent Super Smooth Cardstock and cut out the image using a stitched rectangle die.

I measured my cut out image and then cut another piece of yellow cardstock 1/3 of an inch larger to use as my mat (as seen below)

I proceeded to color the gal in with Spectrum Noir markers.

A few Nuvo drops were added as accents

And there you have it!

Have an inkredible day!

Lucky Charm Gal

Book Nook!

Hi Friends!

Today I’m sharing a card using a new release from Angie Blom Digital Designs called Book Nook!

Isnt this just the coziest image?

I started off with a kraft colored cardstock base and cut my woodgrain patterned paper 1/4 of an inch smaller for my mat.

I downloaded my image onto Accent super smooth cardstock and colored with my Spectrum Noir markers.
Once colored I used a stitched rectangle to cut out my image. I used a sponge and a River Rock dye ink pad to add a bit of color to the edges.
I tied some twine string to the top of my card and it was complete!

Thanks for stopping by and have an inkredible day!

Spring Vibe

Who is ready for Spring?
I certainly can’t wait to see the flowers peeking up through the snow, the green buds begin to grow on the trees and the furry critters start to frolic in my yard once again!

Until then, I can put myself in a spring vibe by coloring up some beautiful spring/Easter images from Angie Blom Digital Designs. This gorgeous wreath is a new release in the shop today! Be sure to check them out!

For this card I started off with a colored cardstock base and cut my patter paper 1/4 inch smaller

I printed the image and used my Scan & Cut to cut it out. Then I used a mix of Copics and Spectrum Noir markers to add color.

The sentiment was printed and cut out using a rectangle stitched die.

Both my image and sentiment was adhered with foam tape for dimension and some string and sequins add some accents

And there you have it!

Have an inkredible day!

You light up my life!

Hi Friends!

I struggle with masculine cards but when I saw this image from the “camping adventures “ kit by Angie Blom Digital Designs it sparked an idea!

I made this card for my teen for Valentine’s Day , although it would serve for other occasions as well!

i started off with a gray cardstock base and cut the patterned paper 1/4 inches smaller as my mat.

The image was printed on Accent cardstock and colored with Spectrum Noir markers. I used my Scan & cut to cut out the image.

A rectangle die was used to create the background for my lantern and a few fireflies were added as accents (fireflies are from Stampin’ Up!)

I printed my own sentiment in Word

I thought it was the perfect for a teen! Not too cutesy.

Have an Inkredible day!

Cookin’ Up Sass

Hi Friends!

I don’t know about you, but I don’t like to cook HOWEVER cookin’ up a ‘lil sass is something I can (and love) to do!

This kit from Angie Blom Digital Designs is perfect for whippin’ up a cute card! It comes with some funny sentiments and this kitchen scene is just adorable ( and much cleaner than my kitchen right now!)

I started off with a black cardstock base and then I cut my light pink mat 1/4 inch smaller.

You may need to zoom in a bit but if you look closely you will see that I ran my mat through my Big Shot using a brick embossing folder. I just love embossing folders for adding texture!

The kitchen was printed on Accent smooth cardstock, cut with a rectangle stitched die and colored with Spectrum Noir Markers

Once colored, I glued the image to my mat (as shown)

My sassy gal was also printed on Accent smooth cardstock and colored. She was cut out using my Scan & Cut and popped up with foam tape. I made her slightly larger than my background which is one of the many things I love about digis- you can alter them!

I printed the sentiment and cut it out using a stitched rectangle die and popped it up using foam tape as well!

And there you have it!

Have an inkredible day!